Today we will talk about taking a screenshot in selenium script. But let us first understand that why taking a screenshot is so important?
As the size of our test cases increases, debugging the issues in script becomes much more difficult task. If we are running, say about 100+ test cases, and if some of the test case fails, It will become a tedious task to determine the point of failure.
So, Screenshot helps us to pinpoint the failure in our script. In other words, screenshot helps us in easier debugging and identifying the failure.
Create class to capture screenshot:
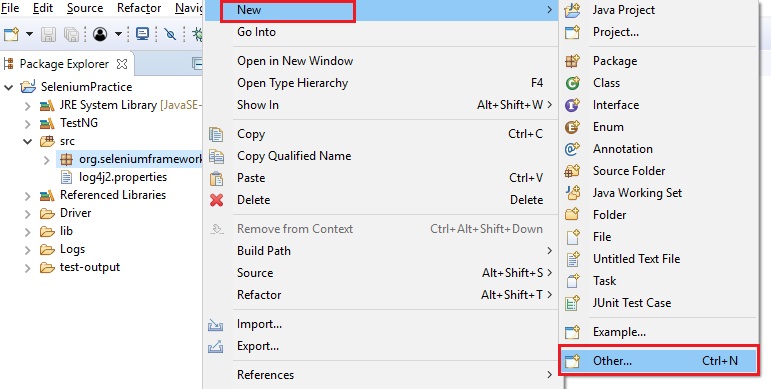
- Right click on package > Click New > Other
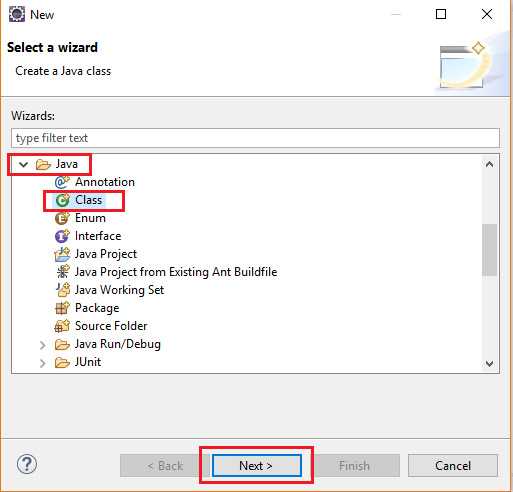
- Expand Java > Click Class > Next
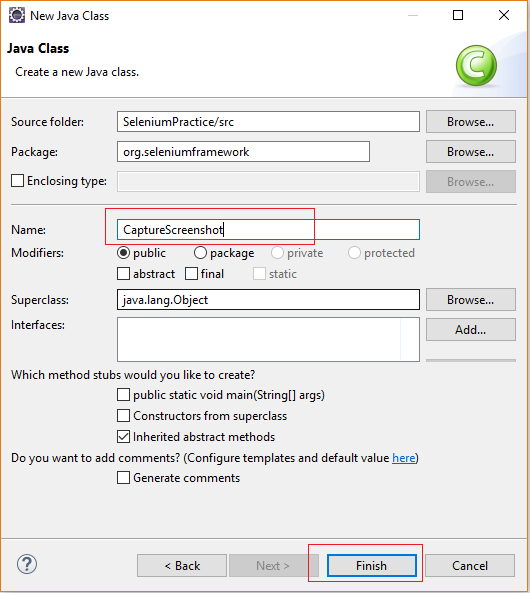
- Give name as CaptureScreenshot > Click Finish
- Here is the simple code to capture a screenshot:
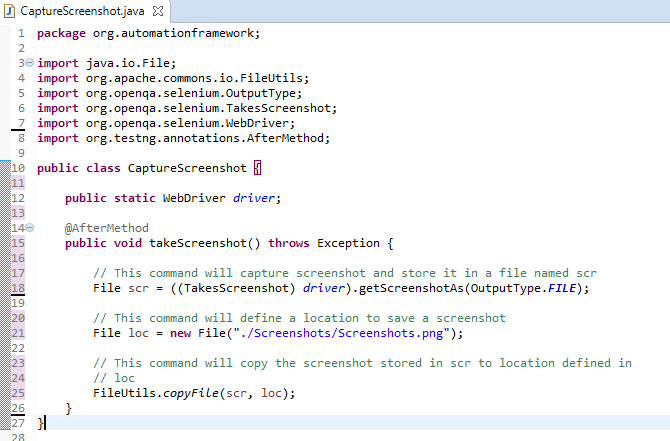
In the takeScreenshot() method, we created a file named src in which screenshot will be stored a s file. The screenshot will be captured by getScreenshotAs() method. As webdriver interface itself does not contain getScreenshotAs() method. So, in order to use getScreenshotAs() method, we need to implement TakesScreenshot interface. To do so, we need to cast webdriver object to TakesScreenshot type. That’s where ((TakesScreenshot)driver) part comes in. The other object of type File named loc is used to tell driver where we want to store our screenshots. copyFile() method of FileUtils class will copy the screenshot file to the given location.
- Now, In real life scenarios, We only require screenshots when the test cases fail. So, we need to slightly tweak our code so that it will only capture the screenshot when any test case fails:

In this code we have used ITestResult listener. It will provide us with test case status. We are comparing the status to check if the status of test case is pass or fail. If test case fails, then screenshot will be captured.
Also, we are using @AfterMethod to run this method after every test method.
- We still have one problem in this code, every time it will capture the screenshot, it will override the previous one. To solve this, we simply need to create a time stamp, i.e, we will attach the date and time with screenshot name so that each time screenshot name will be different and it will not override the previous screenshot.
Hence our complete code will look like this:
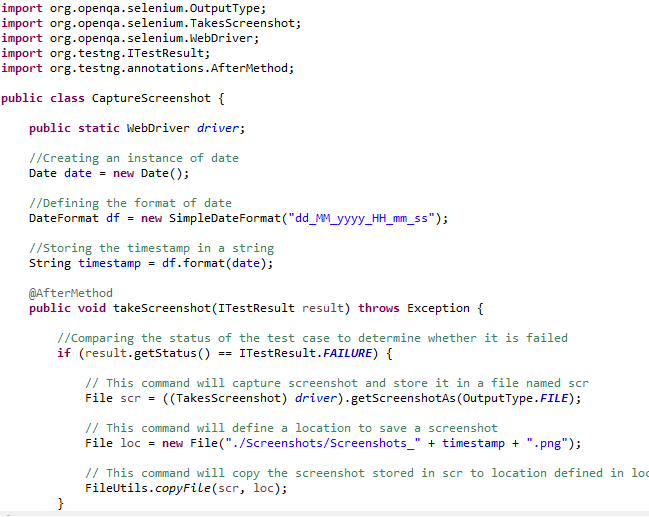
To create a timestamp, we need to take system date and time. Date class helps in achieving that. So we need to create an object of this class. SimpleDateFormat class allows us to set the format in which we want to display date and time. format() method is used to return a string of formatted date time stamp. We just have to append this timestamp with the screenshot name so that each time screenshot name will be unique.
Hope this article was helpful for you.
Comment below to give suggestions or to ask queries.
Have a great day!!!
