In the previous post, we learned how to write basic Xpaths to find web elements. Today we will cover much more complex scenarios and will learn ways to counter those.
Sometimes, we will come across some elements whose attribute values are not static, i.e, it keeps on changing. Take an example below.


Suppose the text “It’s free and always will be.” is not constant and keeps on changing. But it will always contain “It’s free” text. So we can identify it using contains() method.
- Contains(): It is used with the attributes in xpath to find the element with partial text as shown in below example. So we can write xpath using contains like this:
Xpath using contains()—> //div[contains(text(), ‘It’s free’)]
Without using contains we have to match the exact text which will not be useful for identifying dynamic elements.
Xpath without using contains() —> //div[text() = ‘It’s free and always will be.’)]
Note that there is no ‘@’ with text(), because text is not an attribute but just plain text.
One more example below:


Xpath using contains()—> //input[contains(@name, ‘mail’)]
Xpath using contains()—> //input[contains(@class, ‘input’)]
- AND & OR: Sometimes, there are no single unique attribute to work with the element. In that case, we can combine two or more attributes in a tag to find an element using AND & OR. The format of these 2 is as follow:
Xpath—> //Tag name[@Attribute1 = ‘Value’ and @Attribute2 = ‘Value’]
Xpath—> //Tag name[@Attribute1 = ‘Value’ or @Attribute2 = ‘Value’]
AND: In AND expression, attribute 1 and attribute 2 values are matched and should be present to locate the element. It fails to find the element if any one condition fails. Below is the example using reference of above image:
Xpath—> //input[@class = ‘inputtext’ and @name = ’email’]
We can join two or more attributes directly and it works same as AND: //input[@class = ‘inputtext’][@name = ’email’]
OR: In OR expression, attribute 1 and attribute 2 values are matched and any one should be present to locate the element. It means at least one condition should be true to find element using OR. It fails to find the element if both condition fails. Below is the example using above image reference:
Xpath—> //input[@class = ‘inputtext’ or @name = ’email’]
- Start-with(): This method also matches the partial text on attribute values just like contains() method but the difference is that this method matches the starting text of the attribute only. It is useful for the attributes where the last part is changing continuously but the starting text is static. Below is the example using above image reference:
Xpath—> //input[starts-with(@class,’input’)]
Sometimes, the methods we discussed till now are also not enough to locate an element. We may come across a scenario where we don’t have any attributes to work with or even if we have one, that is not the unique one. so, how can we overcome this difficulty? Selenium provides various Xpath Axes to address these challenges. So what is Xpath Axes? Xpath Axes are some keywords which tells Xpath processor which “direction” to head in. It traverse through DOM using relationship between different nodes such as Parent-child or ancestor and so on.
Format: AxesName::tagName[@attribute=’Value’]
AxesName is the name of axes provided by selenium for Xpaths.
:: is used to establish relation between nodes.
We will go though the most important ones:
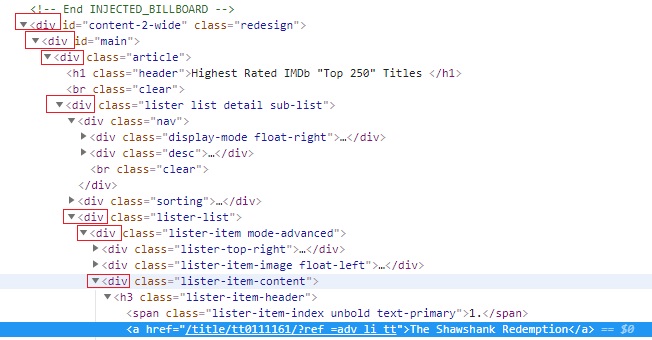
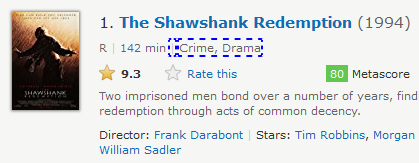
- parent: Selects the parent element of the current node. We will use the below image for reference for our examples.
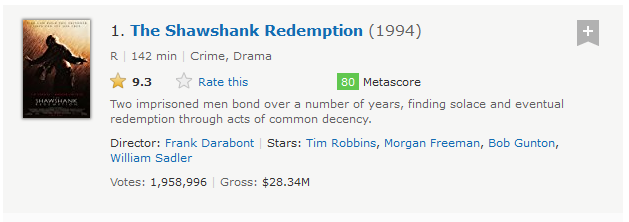
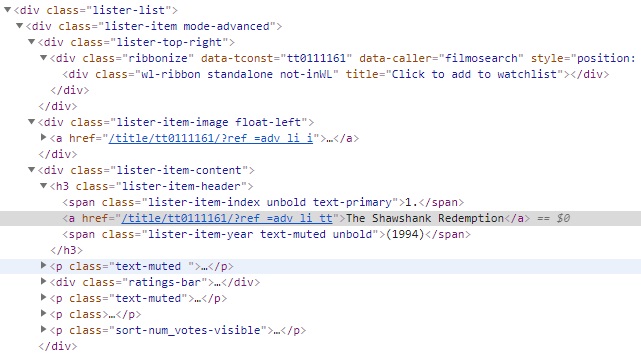
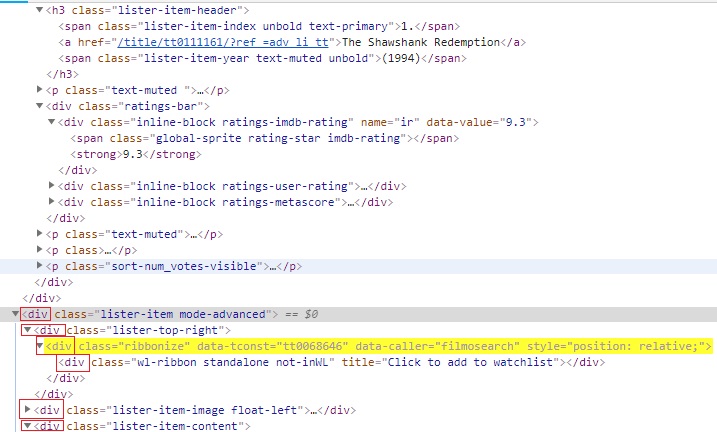
Suppose, we need to locate header node (h3) which has only class attribute.

As we know from previous post that class attribute is not reliable to locate elements. In the above HTML snippet, we can see that the link titled The Shawshank Redemption and year (1994) are under same node, i.e h3 tag. which establish a Parent-Child relationship between h3-a and h3-span. so we will use Parent-axes to access h3.
Xpath—> //a[contains(text(),’The Shawshank’)]/parent::h3
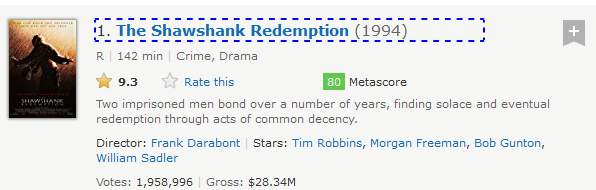
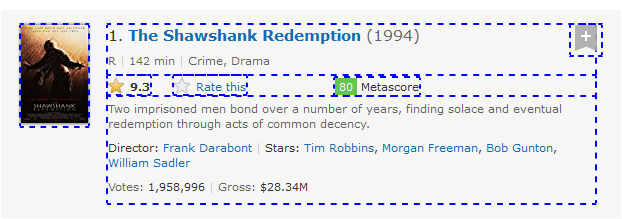
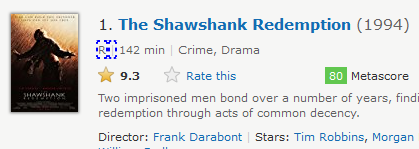
In the below image, we can see the element is highlighted and h3 is located

- child: Selects the child element of the current node. In the above example we have already seen parent-child node. we can use same example to find link titled The Shawshank Redemption using parent node h3.
Xpath—> //h3/child::a[contains(text(),’The Shawshank’)]

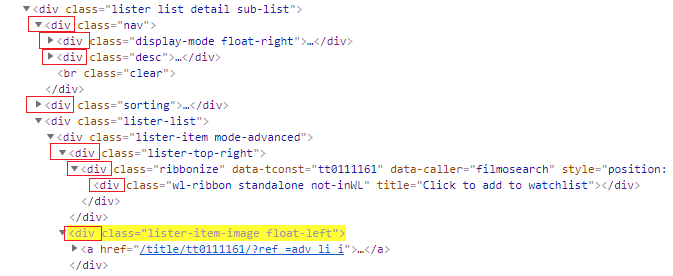
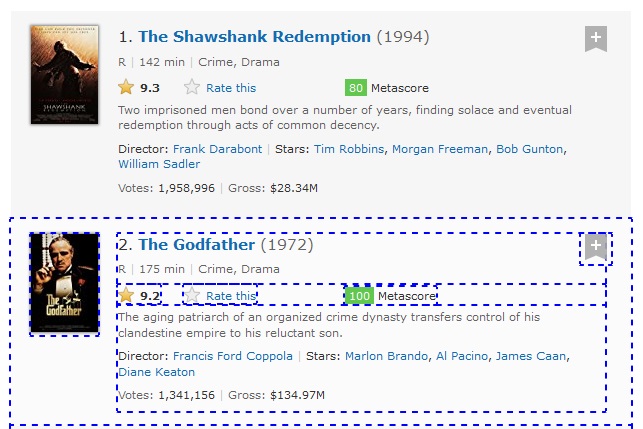
- ancestor: It selects all the parent elements of the context node till root node. We will see it with an example to get more clarity. we are going to tweak parent axes example here:
Xpath—> //a[contains(text(),’The Shawshank’)]/ancestor::div

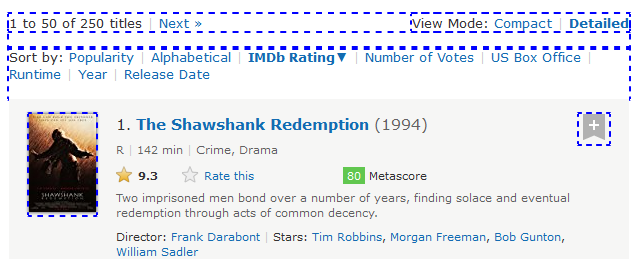
We can see lots of elements highlighted in the image above. This is because the xpath is locating all the ancestor div tags in the page for the link titled The Shawshank Redemption.
Notice that there are few div tags which are not located, that is because ancestor axes will locate all the direct parent only.
- descendant: It selects all the child elements of context node till the root node. descendant is just the opposite of ancestor axes. We can change the above example like this:
Xpath—> //div[@class=’lister-item mode-advanced’]/descendant::div
It located all immediate child div nodes and their child div nodes.

- preceding: It selects all the elements which comes before the current node.
We will modify ancestor example only for better understanding of preceding.
Xpath—> //a[contains(text(),’The Shawshank’)]/preceding::div
It selected all the div nodes before current node irrespective of the relation between nodes. But notice one interesting thing here. There are some div elements which are not identified. This is because preceding axes will skip the ancestor relationship. In other words, it will find all the nodes except the ancestor nodes.
- following: It selects all the elements which comes after the current node. It is the opposite of preceding axes. We will modify descendant example only for better understanding of following.
Xpath—> //div[@class=’lister-item mode-advanced’]/following::div
It selected all the div nodes after current node irrespective of the relation between nodes. Just like in case of preceding, there are some div elements which are not identified. This is because following axes will skip the descendant relationship. In other words, it will find all the nodes except the descendant nodes.
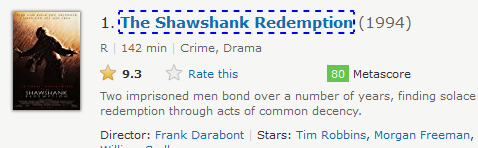
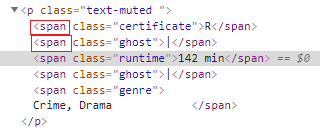
- preceding-sibling: It selects all the preceding elements which are at the same level as of current node. for example, I need to find all span nodes before the span node which has text 142 min and those span nodes should be on same level, i.e, they all should have same parent node.
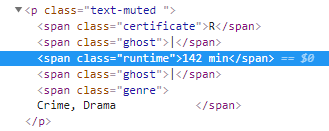
Xpath—> //span[contains(text(),’142 min’)]/preceding-sibling::span
The nodes highlighted in the image are located with this xpath.
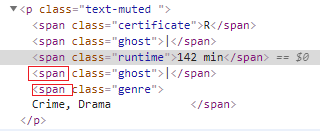
- following-sibling: It selects all the following elements which are at the same level as of current node. Same level node means they all have same parent node. We will take preceding-sibling example:
Xpath—> //span[contains(text(),’142 min’)]/following-sibling::span
The nodes highlighted in the image are located with this xpath.
So that’s all about Xpath. I hope this post will help you in writing better Xpath. If you find it useful then please share it with others as well. And comment your queries or suggestions below.
Have a great Day!!!
